Showing posts with label Elecraft. Show all posts

Sunday, June 28, 2020

SOTA - Raft River Hat Trick

In pouring over SOTA Maps a couple years ago, I noticed a location where three 8-point peaks were in close proximity:


After three attempts and hours on Google Earth, I finally figured out how to get up there. This post is an attempt to make the directions more clear for others--with luck, this can be a 24-point day!

I first activated George and Bull back in 2018. Didn't make it back until ARRL's 2020 Field Day, when I activated 9335 and George the day before Field Day, and participated in Field Day from Bull Mountain (until the wind hit sustained gusts over 40 mph and thunder and lightening "appeared" in the imminent forecast).

The Route

Google Maps and most of the other online maps really don't understand how to get here. Plus, jeep trails and routes on maps in real life end up either 1) completely faded and overgrown or 2) on private land. So finding a safe, feasible, legal way to get up there was a challenge! In short, it's a series of Forest Service roads as you leave Standrod, UT:
  1. From Snowville, UT head west to Standrod
  2. From Standrod, take FS 005 south
  3. At the "T" take FS 011

FS 011 is not for the faint-hearted and absolutely requires 4WD (4L, in fact). At times, I locked my rear diff to get through steep sections with loose rock (rock, not gravel - rock). 

"9335"

As you hit the top of the mountain, you'll see 9335 in the distance. Park anywhere that's safe (there's a lot of undergrowth, so don't take risks and cause this place to burn), and head up to 9335. This is the view from 011 about 1/2 mile south of where I parked to activate 9335 in 2020.


 For 9335, you're above treeline so mostly it's sagebrush, grasses, some flowers, and a whole lotta cow pies. The hike up is just walking over, around or through sage. There is a fence line that cuts the actual summit off - I was on the "wrong" side of the fence line but well within the 250' activation zone, so I activated just west of the actual summit.

George Peak

Your next adventure will be George Peak. You'll still be in 4L for this, for sure! Continue east on 011 until it turns south. It'll connect first with 022 and then with 009.


Follow 009 to the southwest all the way until you hit George Peak. You'll come to a gate (might be closed, might be open) and signs about a private hunting club. You are allowed to pass through but you must stay on the road. 

The route is mostly road, with a lot of grass and sage. 


The views are, however, amazing -- you can see the Great Salt Lake, Promontory Point, even Antelope Island off in the distance.

If you've programmed the coordinates into your GPS, you'll find George Peak easily. On the map, the flat spot on the ridge appears to be the same altitude as the peak in the distance, so it's unclear which is the actual peak.


This either is, or is not, George Peak.


And yet this either is, or is not, George Peak. For the sake of SOTA (and since Bull is literally a drive-up), I activate the craggy peak each time.


One geological survey marker is good, but...


Two must be better :)


Panoramic view from George Peak looking from west to north to east (panning from 270 to 0 to 90 compass degrees). Not a lot of trees up here, but very green.

Bull Mountain

The final "peak" in this hat trick is Bull Mountain. I'm always torn up about this one - honestly, the road literally drives across the summit--how do you consider it activated? It's a moral dilemma but for the purists, you can park somewhere and hike a ways in.

The area around Bull Mountain is incredibly beautiful, with plenty of grassland and some wildflowers.


Not a bad place to watch the sun set!


Bull Mountain itself? Not so much special, just a grassy area where cows like to munch.

This is my SOTA setup for Field Day 2020. I lasted about 6 hours in this spot, after moving here around 10 am. By 3 PM the winds were blowing my antennas down and literally lifting half of my rooftop tent. Tuning into the Weather Service forecast, it was obvious I needed to beat a hasty retreat!

Overall, this 24-point "hat trick" is a fun trip with a couple nice peaks and a flat area that's amazing for propagation. There are other peaks nearby, so the area still has some opportunities for exploration. It's neat to have first activations on all three summits but I hope these directions help other SOTA enthusiasts get out and visit this range. Let's not make it too popular, but more people should have the chance to enjoy the incredible views up here!

- 72 de K7JTO


Sunday, February 18, 2018

SOTA - Thurston Peak

I’m really enjoying my SOTA (amateur radio’s “Summits on the Air”) activations. My first official activation was last week on Frary Peak, the highest point on Antelope Island. Every since moving to Davis County, I’ve had my eye on the toughest peak here, Thurston Peak. This weekend my wife hosted a wedding shower, so I had the chance to escape the house and head up.

Thurston Peak lies to the north of Francis Peak, site of an air radar installation. To get to Thurston, the easiest approach is from Francis Peak, north just a bit along the ridge line. Having gotten a look at the ridge line, however, I’m thinking that hike is no cakewalk. The ridge line is rugged, gaining and losing decent altitude at every lesser peak. In the winter, the road to Francis is closed due to snow. Many winters sees this road as a popular snowmobile destination, but this winter in Utah has been almost snowless - the snow line this weekend was right around 7500 feet or higher. I have to admit, if there were more snow I might have asked for a lift to Francis so I could tackle both peaks!

The morning started early, with a 5:45 am “BOG” trail time (boots on the ground). Knowing I’d be crossing a snow field, I had to pack a fair amount of gear - snowshoes, hiking poles, and an ice axe. Unlike most trips, I used every piece fo gear I brought.


The trail begins at the Fern Hollow trail head, which is reached by taking SR 89 to the Cherry Street intersection. From the parking lot, head east up the trail. Some people take the direct route straight up the hill, but I prefer to follow the trail east, on the south side of the hill, and then back up from the east side of the ridge. Regardless of the approach, eventually you end up on an east-west ridge due east of Antelope Drive, which is the north ridge of the "Middle Fork Hobbs Creek" canyon. I hope you enjoy the view, because you’re on this ridge for a long time!

Looking down from the ridge

As you climb, the ridges just keep coming. There are three or four of them, progressively more north of each other. The going is tough - you’ll climb roughly 4000 feet in less than 3 “horizontal” miles.

I call this the "Lunch Counter". Great view for a snack and a rest.

Eventually you'll clear the ridge and end up solid on the west face of the north south ridgeline. At this point, you've got options: continue due east to pick up elevation, or start to head south/southeast to draw closer to Francis Peak. On my trek this weekend, I made a slight route finding error, heading south around the final ridge. This put me at the base of a narrow, steep avalanche chute. The snow conditions were tough in this chute--alternating between crusted and soft, so I ended up breaking through the crust every other step. It was quite exposed, so I retreated west as I climbed up out of it. It cost a fair amount of time and a lot of energy. Lesson: don't head south until you've cleared the final peak on the Hobbs Creek Middle Fork ridge.


Wind-loaded snow conditions

As I write this blog, we're receiving 6" to 12" of snow in the valley, so the snow conditions yesterday are irrelevant. But crossing south along the face just below the ridge line was consistent: wind-loaded, crusty, cupped snow. Ideal for climbing, although at times I felt a bit over-exposed. I was climbing on MSR snowshoes with an alpine ice axe. I think I'd have been more comfortable either in crampons or roped up with a buddy.


Close up of crusted, wind-loaded, cupped face.

I routed several hundred feet below the ridge, for maybe a mile or two from the middle fork Hobbs creek to the Thurston Peak ridge proper. Thank heaven for glacier glasses, too. Once the sun broke over the ridge, it was bright and nearly directly head on.


First Glimpse of Summit

After traversing south below the main ridge, the last effort to the summit is a pretty big hump due east up the Thurston Peak ridge. I selected this route because the actual north-south ridge looked pretty rugged and I wasn't sure of the snow conditions. On the return route, I stayed closer to the ridge line because the entire traverse to the south I felt really exposed, and it just got worse climbing that last hump to the summit. The ridgeline route cut off a good 15 min on the way back.


This is what feels like to summit


This is what it takes to get there (and back). I promise - my battery died the moment I walked in the door. No extra steps counted.


Plaque explaining who Thomas Jefferson Thurston was


360-degree view


My SOTA Setup

I learned my last hike when I hit Frary Peak that, as excited as I might be to "play radio," it's important to take care of myself first. Frary is a forgiving hike, frequented by lots of hikers. Thurston? I reckon to be one of a handful who summit this peak all winter. There was no room for mistakes like failing to hydrate, eat, or put on extra clothes.


This video shows why taking care is important - the wind was blowing at a good 20 mph. The wind chill factor was enough that exposed skin was frosted in seconds.


Setting up the KX3


One guy line for the Buddistick


I buried the hiking stick in snow, and set the ice ax in front of it for stability. With the wind blowing as it was, only two guy lines were necessary.


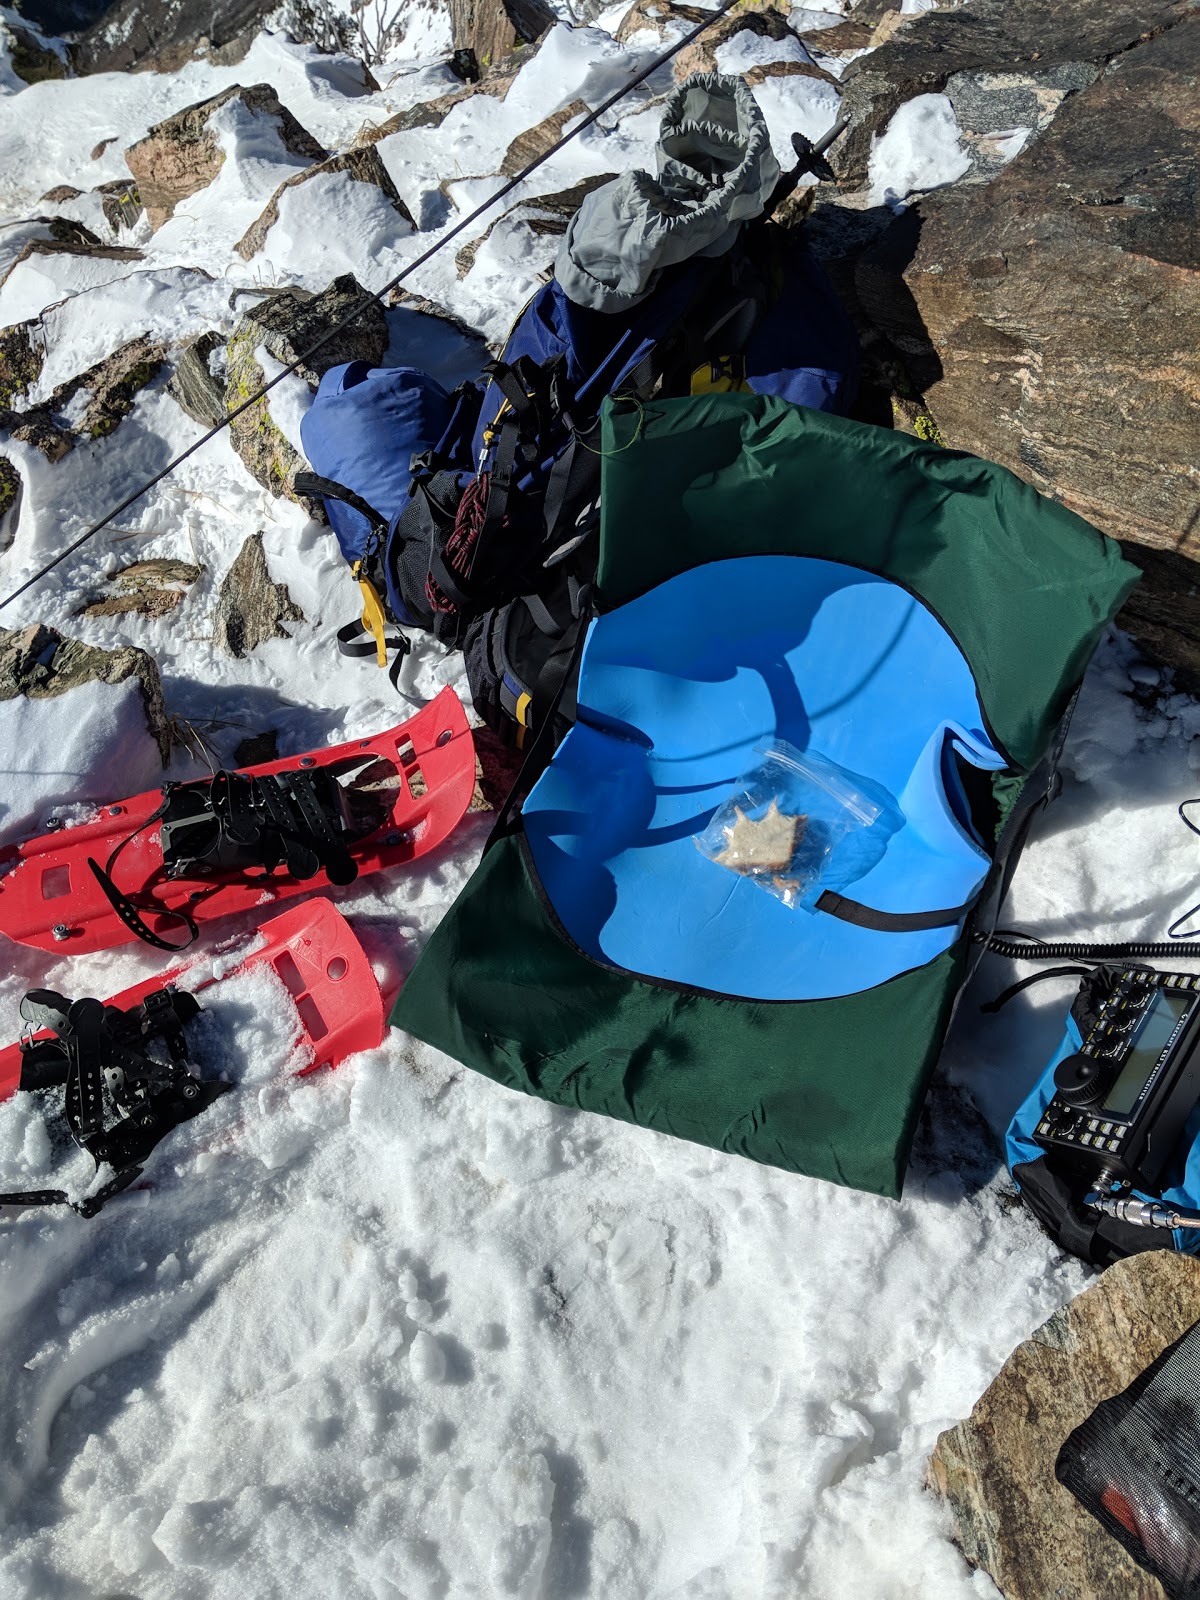
SOTA base station - KX3, Thermarest chair with closed-cell foam.

h

Buddistick set up, leaning against the wind. The Ogden Valley is in the background. The backpack was a wind shelter.

I'm learning SOTA activations go fast. As soon as I set up, I called CQ and was picked up by my buddy WB6YOK (whose QTH is about a mile due south of Thurston. I couldn't self-spot on the SOTA app, so Chuck spotted me. After that, I had 11 solid QSOs in 20 minutes, and then activity just dropped to nothing. My activator log:

TimeCallBandModeNotes
18:05zWB6YOK14MHzSSBGroundwave
18:05zWB7ULD14MHzSSBGroundwave
18:08zW5ODS14MHzSSB58 into OK
18:10zN4EX14MHzSSB44 into NC
18:11zWD9F14MHzSSB55 into IL
18:12zWA2USA14MHzSSB55 into IN
18:17zKD0YOB14MHzSSB57 into MN
18:18zK8HU14MHzSSB59 into VA
18:18zAK5SD14MHzSSB45 into TX
18:19zWB0KIU14MHzSSB56 into IA
18:20zAB5V14MHzSSB47 into TX - Randy
18:21zK0LAF14MHzSSB33 into MO

Signals were varied, but this is my second SOTA activation and both times have had strong signals into the East, with VA being the best signal of the day. It was great chatting with Randy AB5V in Magnolia, TX who is a SOTA activator himself. I had several SOTA chasers on this activation, which is great.

With the bands settling quickly, I packed up and made my way out quickly. A couple mountaineering quips serve me well on each climb. First, as my friend and climbing partner Fredito KE7JVA says, there are old climbers, there are bold climbers, but there are no old, bold climbers. Caution is the mother of safe arrivals. Second is that the majority of mountaineering incidents happen on the way home. Climbers often forget they need as much energy to get down safely as it takes to get up to the summit. Once I was packed up, I took a moment to center myself. On the way up, I decided I wanted to return a different route, due to the excessive exposure. Had I been wearing crampons, it would have been a different story and I'd have gone back the same way. Rather, I decided to head north up the ridge, climbing down a steep rock section, skirting a nearby summit by traversing to the west through trees, then heading across the snowfield. I stayed much higher on the return route, eventually meeting up with the ridgeline prior to heading west into the Middle Fork Hobbs Creek drainage.

One mistake I made on this trip was to switch from my extra large Nalgene bottle to my CamelBak. They have the same capacity, but the CamelBak tube froze up at the summit, and I had to hike for a solid hour before I could thaw it enough to drink. By then, I felt the dehydration.

The hike home is just a repeat of the hike up - step by step, watch the ice, watch the mud. As I age, my knees get sore on the way down, so it's all about tender steps. It underscores the need to travel light.

A hike like this is roughly the equivalent of hiking from Paradise to Camp Muir, Mt. Rainer's staging site for a final summit attempt. Each time I pull off a hike of this magnitude, I say the same thing: "never again, not for several years," but sitting in my armchair writing this blog, I'm already thinking about what the next peak will be.

Saturday, February 10, 2018

SOTA - Frary Peak

Had an awesome afternoon activating Frary Peak (W7U/NU-073, or DN30vx). This peak is located on Antelope Island, in the southeast corner of the Great Salt Lake, in the "Antelope Island" state park. As a Utah state park pass holder, all I had to pay was $2 to drive across the causeway, so it was a cheap way to spend an afternoon.

It being so early in the year, the peak is usually covered in snow and the upper parking lot was closed, so that added about 1/2 mile each way to what's generally a 3.3 mile hike/climb, with 2100 feet of elevation gain. The trail's been rerouted since I last summited, and I really like the new route. It's a lot safer - it passes south along the west side of the summit, just below the actual summit. Then it switchbacks north. So much easier on the knees.


Starting off the climb. It was in the lower 40's with a stiff wind. All the exertion of carrying a heavy pack allowed me to hike in warm pants and a light long-sleeve tech shirt.

The approach is from the north and generally follows the ridge, with some pretty stunning views of the Great Salt Lake, as well as the Wasatch range.


Just in case you weren't paying attention, this is a trail. ;)


Looking west off the lower trail. The rise in the distance is "Elephant Rock"


Looking to the NW across the Great Salt Lake


Again to the NW over the Great Salt Lake.

After a fairly strenuous hike, you traverse about 200' below the summit, headed south on the west side of the summit. This traverse is mostly new - it used to end with basically scrambling straight up, which was pretty intimidating. A local ham who loves the island worked hard to get some Boy Scout crews together to redo the trail. It's very nice now.


Finally, you're there! This is the original survey marker from 1892. There's a round marker in the rocks just to the south of this.


Without further ado, in temps around 30 with a slight breeze (enough to evaporate any warmth in a hurry) I went about setting up my SOTA station.


KX3, with 12v 5ah SLA battery - ugh, so heavy. Picking up a 14.4v 4 AH LIPO RC battery soon, I hope. What I love about the KX3 is that it's half the weight of my old FT817, can output as much as 15 watts, and has a tuner built in. Right there it's saved me a ton of weight!


I haven't taken the time to build my SOTA antenna (half wave wire antenna with a matching box at the end), so I lugged my Buddistick up with me this time. I've only made a couple contacts on this in the past, in spite of owning it for 4-5 years and trying valiantly! I wasn't sure what to think of it today, but it came through right along with the KX3!

This SOTA trip is a big deal to me. It's been (honestly) years since I last made a contact on HF. I've sold all my older gear, and bought an Elecraft KX3 which I recently built. After a week of hammering away on HF bands here and there, I'd started to wonder whether it was my antenna, my coax, or actually my radio but I've not had a single contact. Judging by my logbook today, I do believe I can narrow it down to my coax.


I logged 18 QSOs (threw out two because the call signs aren't showing up in the FCC database - I must have misheard the operators). Great day's work - including an amazing QSO with Heriberto in Puerto Rico, as well as KB3RHR in Pennsylvania.

TimeCallBandModeNotes
23:30zKG5PJG14MHzSSB59 to Stillwater OK
23:30zWA5OBV14MHzSSB10w 59 to Phil in Stillwater OK
23:30zWB6YOK14MHzSSB4 miles LOL
23:35zKB3RHR14MHzSSB55 into PA
23:40zKN8TOA14MHzSSB57
23:40zW0MNA14MHzSSB55
23:45zKP4EYT14MHzSSBPuerto Rico - 57
23:45zW0ERI14MHzSSB55 KS
23:45zW5AHA14MHzSSB58 into Tipulo MS birthplace of Elvis
23:45zKD0MQO14MHzSSB3x3 into Missouri
23:45zK5UQE14MHzSSB57 into LA
23:45zKI4TN14MHzSSB1x1 hard to copy
23:45zK1LIZ14MHzSSB2x2

Quick summary and a 360 shot from Frary:


All good things must come to an end. I packed up quickly as soon as the action died down (didn't even bother with 40 meters). The hike down was just as rewarding as the hike up. I've been struggling with knee problems since September, but I've been climbing a lot of local trails lately and the work is paying off - the soft tissue is getting strong, and the hike down didn't really cause much pain at all.


Looking west, about halfway down.


These are the peaks just above my house - there are 5 SOTA peaks right here, hoping to activate them all this summer.


Saturday, January 18, 2014

Elecraft T1 Tuner Repair

I've been kind of "radio inactive" whilst sorting out a few things over the last 3 years or so. First time operating in quite a while was back in October up in the Fish lake National forest with my sons. Just prior to leaving, I visited my buddy Chuck to run my gear through its paces. We hooked up my T1 QRP tuner (actually a max of 20 watts) to his FT-897 and my PRC74 military radio whip antenna. I keyed an AM carrier, pressed the tune switch and man--that old military whip tuned up in about 1.5 seconds. Well, that's what I thought... In actuality, I either hit it with too much RF (might have turned down the wrong power settings on the 897) or the tuner just hadn't been used in a long while... Regardless, I fried two diodes. They are barely visible on either side of the right-most torroid on the bottom of this photo. Small blue components aligned horizontally in this snap.


I looked all over and found replacement diodes at Mouser. Ironically, they are fifty cents each, and shipping is $6 (and it's no wonder--my two diodes were shipped in a mid-sized cardboard box!).

I've been stabbing away at desoldering these diodes, but no joy. I'm taking them to my buddy's. He's got a beautiful desoldering station (no joke--I seem to use it a lot). This repair should go quickly! Along wth testing my PFR, we're doing the repair in the next couple days. Hopefully my next post will be of a successful tuning sequence with my 817 and his Gap Titan antenna.

By the way: the trip to Fish Lake wasn't a total bust. That old whip is resonant on 10m (when switched to the antenna's 40m configuration), and 10m was wide open. At 5 watts with right around 1:1.5 antenna matching, I was using PSK to contact France and several US stations. It could have been worse!

73's de K7JTO

Sunday, December 12, 2010

Backcountry QRP

I've been spending a lot of time researching and preparing to buy a back country QRP rig. I plan on carrying my VX-7R with me on my next 50-miler (coming up in 9 months now), but I really want to have a rig with me that will reach out across longer distances. I want this for two reasons: improved emergency communications and good back country QSOs.

Improved Emergency Communications:
Being responsible for 10, 15 people on a trip is a daunting challenge. I really want to be sure our emergency response plan is solid--that starts with safety, which begins with planning.

  • We plan a safe trip, with reasonable hiking distances and reasonable prep hikes. 
  • We prepare by ensuring the boys have the skills to hike and camp in the high country of Utah. 
  • Our group motto is "Don't be stupid" which really means to not take unnecessary risks. 
  • We bring highly skilled leaders--skilled and fit. 
  • We focus not just on reaching the goal, but having a good time along the way (hopefully ensuring no one wanders off because they're depressed, lonely, or mad). 
  • We bring leaders with a strong first aid background, in case we have to respond to a disaster. 
  • Our trip plan has an emergency evacuation plan for each day. 
  • On top of that, two years ago we carried a 2m/70cm HT. 
In spite of all this preparation, I was still concerned that I wouldn't be able to reach out for help. Having a leader run back 15 miles to get to a sufficiently high location is one thing - having the trip leader do it, because he's the only licensed operator, is unacceptable. HF isn't a guaranteed QSO, but the options are much better. I can be buried in a drainage, set up a quick 40m NVIS antenna, and send out a signal. That's the hope, at least!


Better Back country QSOs
Let's face it, 2m radio just isn't friendly to the back-country. On these trips, we try to camp at lower elevations which means we're generally down in a drainage, near a lake. Now remember - in the mountains of Utah, 'down' means as low as 10,500 feet above sea level. We're still pretty high! But 2m operation requires line of sight to the nearest repeater, which turns out to be a 2m repeater linked to the Intermountain Intertie system. In order to see it, I have to be at high elevation to clear other mountains. On our last trip, there were about five points (10 miles apart) that met these criteria. With HF, I have a much better chance of sending out a signal--in fact, with an NVIS antenna I have a good chance of hitting people within my general region (Utah). With a standard antenna, well, the continental United States is pretty likely! Bottom line: if I'm carrying radio gear, I'd like to be sure I'm getting out and using it. I want the reward, but I'd also like the boys to get a taste of what's possible.


Operation Mode
So I've been reviewing back country options--obviously I've been into light QRP work, having picked up my 817 last year (and really enjoying the long-distance SSB conversations as far away as Seattle, BC, OH and AK). So of course my initial thoughts leaned toward just hauling my 817 and a big battery with me - and I even have a couple of scouts willing to help carry stuff. But as I added the weight up, I just wasn't sure... For the last long-distance hike, I was carrying about 50 pounds. I started above 65 pounds and come out 15 pounds lighter. And I was feeling it, the entire trip. This trip has to be different...


Meanwhile everyone I spoke with kept telling me the same things I'm reading: pound-for-pound, watt-for-watt nothing beats CW. PSK-31 and other digital modes can really reach out (how about Salt Lake City to Kamchatna on 5 watts?), but PSK means bringing my 817 AND a laptop AND a sound card interface! In the end, everything keeps pointing back to CW... I'm done fighting the trend and I've concluded that I need to learn CW and gain experience operating that mode. And thus, a plan is born...


CW Transceiver Options
Now that I'm going with CW, I have a world of options. Going back to my goals, I want 1) a radio that can communicate in the event of an emergency, without me having to hike to the highest point around, and 2) a radio which can communicate in the evenings when I can have an enjoyable QSO. Moving to CW means there are a number of radios which fit the bill--the challenge is figuring out which radio. Four kits have been highly recommended--I'll try to offer pros and cons of each.

  • Elecraft K1: The Elecraft K1 is probably the gold standard for rugged QRP CW rigs. It's relatively small (2.2"H x 5.2"W x 5.6"D), includes an option for internal batteries, and under 1.4 pounds. If you mix and match just right, you can actually get 6 bands out of this tiny rig! Some drawbacks for me, though, are 1) price (nearly $700 with the options I'd want), 2) size (it's a tiny rig but still larger than I want to stuff into my pack), and 3) weight. Add up all the optional components and such and I think you're closer to 2.5 or even 3 lbs. If I didn't own an 817 and I wanted to operate QRP portable CW, I'd probably buy this puppy in a heartbeat. I may yet own one, in fact!
  • Small Wonder Labs Rockmite: at the time of writing this, I'm expecting to find one of these under the tree--read my review in a few weeks. The Rockmite is a tiny radio designed for just what I'm talking about: very portable back country use. It's a 40m CW rig that outputs around .5 watts (500 milliwatts--QRPp) on two frequencies. It's ultralight-designed for emergency use. I really can't wait to build mine and start practicing. In fact, my son gave me a Sour Patch Kids tin to put the radio in! Problems are 1) the low output. You always compromise something for weight - in this case, I'm definitely compromising power. 2) dual frequency, single band. This is a purpose-built radio for emergency and probably for 'special interest use' only. NOTE: I am building one, I will use one... I'm not dissing it, I just don't think it'll do what I want.
  • Elecraft KX1: I have been looking at the Elecraft KX1 for probably six months now. This is a slick little rig - seriously feature-rich radio packed in a tiny package! It's portable, it can be self-contained (power, tuner, etc.) and can handle up to 4 bands with optional kits. It can output just south of 4 watts with an external 12v battery, too. Normal operating wattage with internal batteries is only about 2 watts though. That's not bad for QRP CW--in fact, even 500 milliwatts can get the job done most of the time. Still, it's got some downsides. First, there's the cost... Fully kitted out (internal tuner, all 4 bands, attached paddles) it'll run close to $600--that's more than I paid for my 817! Second, feedback is that the internal tuner just isn't broad enough to tune everything you might throw at it. Finally, there are additional odds-and-ends to bring with: external power to boost output signal to 4 watts, balun, wire-to-bnc adapter, etc.
  • QRPKits PFR3: my final option in this line-up is the QRPKits PFR3. This radio was inspired by the KX1. In fact, it's the build-out of a very experienced answer to "what's the perfect backcountry radio," as answered by Dr. Bob Armstrong (N7XJ). As a long-time owner of a KX1, he had a series of gripes about that radio. As QRPKits' Doug Hendricks listened to Bob present to a meeting of the Arizona ScQRPions club, he took notes. Good notes. And less than a year later, the PFR was born. The best thing about it is the price for performance. For half the cost of the KX1, the PFR delivers two bands (40 and 20), 5 watts, internal manual tuner (with a much wider tuning capability than the KX1), 8 AA batteries rather than six, and a bright yellow case that's just stunningly unique. 
In reviewing this round-up of radios, I've obviously caved and bought myself the Rockmite. That's just because I really want an Altoids tin radio! I've eliminated the K1 for size, weight, and cost. It came down to the KX1 and the PFR3. Frankly, I had eliminated the latter until last Saturday's meeting of the Davis County Amateur Radio club. After the meeting, Bob Cart WR7Q was chatting with me. When I told him I was saving up for a KX1, he referred me to Bob and said I'd love the PFR3. After a LONG thread on the QRP-L reflector, I'm sold - this is the way I'm going.

So I'm saving up, waiting patiently, and anticipating the chance to build out the PFR and report on it. Hope the above really helps - lots of info, but it might save someone else a ton of time researching and saving.

73's

K7JTO